Armory Window
Open from Toolbox Armory or /show armory . Per-window options live under Settings Armory .
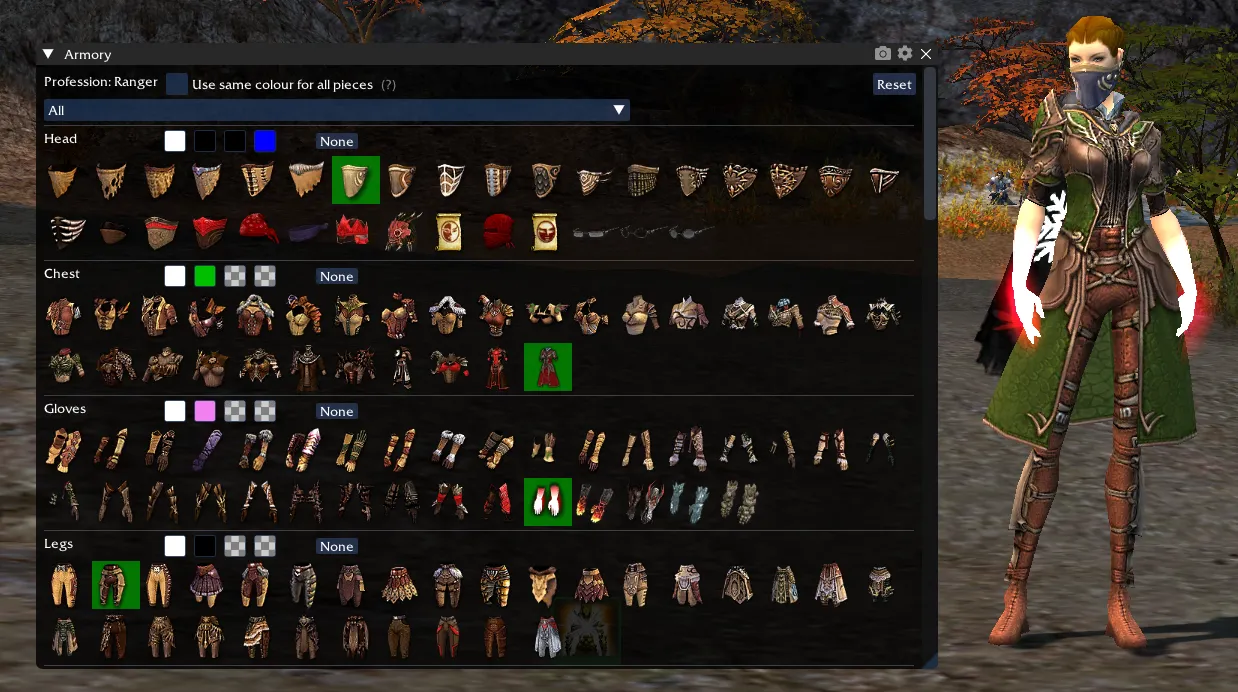
The Armory Window is a powerful feature that allows you to preview all armor in the game in all colors on your character. This tool is perfect for planning your character’s appearance or simply exploring the vast array of armor options available in Guild Wars.
Features
- Preview All Armor: Browse through every armor set available in the game for your character’s profession.
- Color Customization: Apply any dye color to each armor piece to see how it looks.
- Real-time Updates: Changes are applied to your character in real-time, allowing you to see exactly how the armor will look in-game.
- Campaign Filter: Filter armor sets by campaign (Core, Prophecies, Factions, Nightfall, Eye of the North).
- Costume Preview: Preview full costumes and festival hats.
How to Use
- Open the Armory Window from the GWToolbox++ menu.
- Select the armor slot you want to change (Head, Chest, Hands, Legs, Feet).
- Browse through the available armor pieces for that slot.
- Click on an armor piece to apply it to your character.
- Use the color pickers to change the dye colors for each part of the armor piece.
- Use the campaign filter to narrow down the armor options if desired.
Note that every armor piece can also be applied using a chat command. The correct command format is shown when you hover over an item in the Armory Window. For example: /armory "Imposing Mask" 3 3 3 3. The text in quotes is the internal armor identifier, and the four numbers after it are the dye channels applied to that piece, which together apply the selected item to your character using the specified dye color values. Right click an item and press “Copy chat command” to copy the command. Note that the chat command /armory reset will reset to the original character outfit.
Notes
- The Armory Window only changes the appearance of your character locally. Other players will still see your actual equipped armor.
- Some special armors or costumes may not be available for preview.
- Weapon previews are currently not supported.
- There is currently no way to keep the applied armor appearance permanently. However, you can automatically reapply it every time you zone by using the Hotkey module. See the Tips section below.
Remember to click the “Reset” button if you want to revert all changes and return to your originally equipped armor.
Enjoy experimenting with different armor combinations and colors to create your perfect look!
Tips
Reapply armor every time you rezone
There is currently no built‑in way to keep your previewed armor applied permanently. However, you can use the Hotkey module to automatically reapply your chosen outfit whenever you enter an outpost or explorable area.
To set this up:
- Collect all the chat commands for the outfit you want to use by hovering over the items in the Armory Window. Right click the item and press “Copy chat command” to copy the command. For example, as a Mesmer:
/armory "Imposing Mask" 3 3 3 3
/armory "Obsidian Attire" 3 3 12 12
/armory "Luxon Gloves" 3 3 12 12
/armory "Elite Noble Hose" 3 3 12 12
/armory "Vabbian Footwear" 3 3 12 12- Open the Hotkey module and create a new hotkey. Set the method to
Send Chatand the channel to/Commands. - In the message box, paste the first command without the leading slash. Example:
armory "Imposing Mask" 3 3 3 3 - Enable the following options:
Trigger hotkey when entering explorable areaandTrigger hotkey when entering outpost - Under Character Names, enter the name of the character you want this outfit applied to (press Enter to add it). This prevents the hotkey from affecting all characters and triggering errors.
- Close the Hotkey window and fast‑travel to another outpost to test whether the hotkey is triggering. If set up correctly, the armor piece should be applied automatically.
- Repeat steps 2–6 for each additional armor command in your outfit.
- Note that the game window must be in focus for the trigger to activate.
- You can also group hotkeys to keep your Hotkey window organized. Refer to the Hotkey module documentation for details.
- The armor will be reset to the original for cutscenes.